
|
|
|||||||
| Register | FAQ | Members List | Calendar | Gallery | Today's Posts | Mark Forums Read | Search |
| Loudspeakers Your DIY Speaker designs |
 |
|
|
Thread Tools | Display Modes |
|
#1
 14th June 2012, 10:51 AM
|
||||
|
||||
|
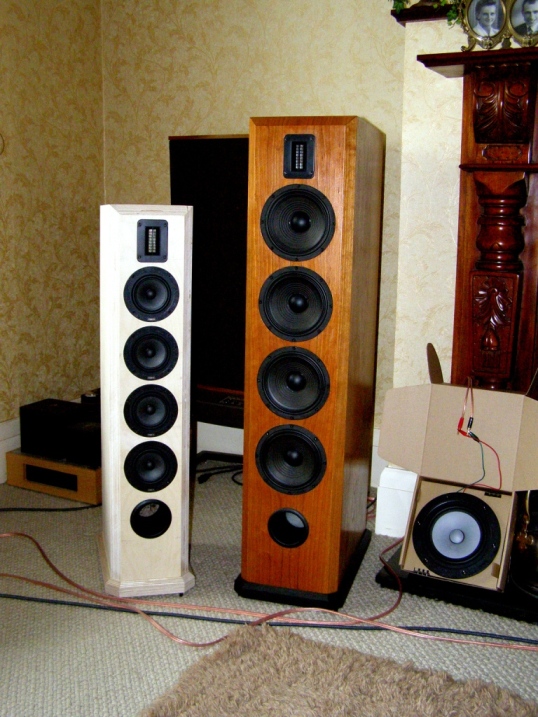
These are a smaller version of my Edingdale speakers for 4 x Markaudio CHBW + Monacor Ribbon tweeter. Details can be found on the MA web site http://www.markaudio.com/.
These are the actual drivers:  Unlike my Edingdale speakers that were designed by me with some help on cabinet alignment by Scott, these are wholly designed by Scott (Scottmoose). I have had some input to the final proportions of the cabinets though. Here's an image new smaller Rossendales alongside the Edingdale speakers to give perspective of their relative sizes. Overall size-wise the Rossendales are 905mm high x 216mm wide x 346mm deep, so quite small and compact for a floorstander speaker.  This is what Scott had to say about these speakers when he sent me the design for building the prototypes. Quote:

|
|
#2
14th June 2012, 10:53 AM
|
||||
|
||||
|
Having burnt some midnight oil I have managed to get the prototypes built and subsequently have had a few good hours listening and appraising these speakers before inviting my mate Chris over for a listen. Heres a photo of the prototype alongside my Cherry veneered Edingdale speakers:
 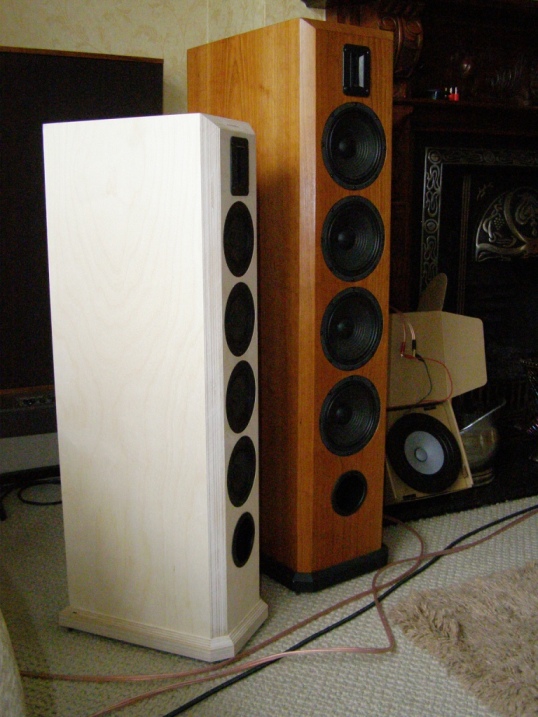 And a photo taken outdoors in my back garden  Initially I had them hooked up to a Passlabs F5 and FM tuner and left them like that for a few days to help bed-in the new drivers. After some 20-hours play I decided to sit down for a critical listen. In essence the goal of the design has been achieved. They are indeed a smaller version of the larger Edingdale speakers. As expected from a smaller box they dont do the same dynamics as their larger cousins and they dont go so low in the bass, but youd expect that from the smaller speakers. One cant defy the laws of physics. The other day I invited my mate around for a critical appraisal as there were some points regards the speakers I wasnt quite happy with. Chris felt the same when he listened. He commented they were missing something and lacked a certain involvement. He said he couldnt get engaged with the overall sound. Chris then got up and said, let me try something, to which he turned down the adjustable L-Pad by 1½dB. This locked everything into place and suddenly Chriss foot was tapping along to the music. Seems silly me had the L-pads set to -5½dB when they should have been set to -7dB. Cant think why I had them set such. I then suggested I remove the speaker cloth I had placed over the port tube. I did this on the grounds of aesthetics, but foolishly it would appear. This gave us a small but significant increase in bass detail. Now the speakers were sounding rather good indeed. Things can only improve with more gradual break-in of the CHBW drivers. Scott says they need around 100-hours to fully free up which should result in a richer more detailed midrange. So these little speakers have great promise especially for smaller rooms where the larger Edingdales are perhaps too large or have too little WAF due to their size. These are small enough I can do flat pack kits as well as full builds, but the kits are going to need some thought of how best to do them. But for now Ill leave them running for a few days to clock up the hours on the drivers and I need to get on with my other builds. After Chris left I did some more listening and found some fine detail and air to the upper mids and treble was not quite right. Listening to the Edingdales with the same tracks confirmed this. I also felt they sounded better with SS amplification than my 300b SE monoblocs. So I decided to swap the LR2 XO with that in my Edingdales. This did the trick but now oddly enough they sound better with my valve amps than the SS F5. So more fine tuning with the crossovers is required to fine tune the performanceand to aid this research I have replaced the original binding post trays with bi-wire ones and re-wired internally the speakers for external Xovers. This should make direct A-B comparisons much easier. So some tweaking work is required to do one these before I am fully happy with them, but I am sufficiently impressed to go the full hog with these and prep the cabinets ready for a piano black paint finish. 
|
|
#3
15th June 2012, 06:45 PM
|
||||
|
||||
|
I do have to add that I believe this CHBW driver to be very good indeed and perhaps a little overlooked by the general DIY buying community. It's a pity there are so few designs out there specific to this driver. The likes of these Rossendale 2-way speakers are ideally suited to this driver when coupled to a tweeter of a quality and performance to compliment that of the CHBW's. Perhaps the Creative Sound Solutions ERT26 or their new (though much more expensive) LD25X would make a rather nice bookshelf 2-way speaker.
|
|
#4
16th July 2012, 02:21 PM
|
||||
|
||||
|
Having just got back from a boys weekend at up in Scotland at my mate Andrews I must say I was rather pleased how these speakers performed. Scottmoose was spot on with his description to me how he expected they would sound. Andrew and I also thought as did NickG, who also accompanied me for the weekend get together, that the little speakers coped very well indeed with some torture tracks and sample test pieces of music Nick had to hand. We also had some pink noise test tones downloaded on a portable hard disc that was interfaced with Andrews Squeezebox Touch player. This showed that the speakers were good to around 35Hz. Very creditable I thought for a small floor standing speaker. There also did not appear to be any dips or sags in the frequency sweep right up to 12kHz when I couldnt hear anything after this, being close to retirement age. Andrew lost hearing around 14kHz as I think did Nick, though Andrew could still hear the pink noise at 16kHz before his hearing deminished. So I call that a result. Not the loss of hearing at such frequencies you guys understand.
On another forum Andrew posted this comment: Quote:
 At the end of the day the sprayer said he was not happy with the results as he had to rush it in the final stages. He said that having gone through the big learning curve and lessons learned with these original prototypes, he would do a perfect finish next time should I give him the chance. So I might just do that. At the end of the day the sprayer said he was not happy with the results as he had to rush it in the final stages. He said that having gone through the big learning curve and lessons learned with these original prototypes, he would do a perfect finish next time should I give him the chance. So I might just do that.As mentioned, we went through a big learning curve with this experiment and now know the pitfalls to avoid and how to address them. Lesson 1: Avoid any sharp corners. When buffing up the final lacquer coats to get that piano gloss look with a pro electric buffer and buffing cream, the circular buffing head digs a little deeper at these corners and so you can end up with the exposed grey primer in a few areas where the buffer was held in place for a fraction too long! The cure is to round-over all sharp corners as they do on car body panels. Only requires a small round-over. Lesson 2: Make your rebated driver cut-outs around 0.5mm to 1mm oversize to allow for paint build up. When I tried to sand back the inside of the rebate this cut through the black and exposed the grey primer around the front edge! Not good. Lesson 3: Dont force dry the paint with heat. Allow it to harden off over night or for 24 hours before applying the final coats. Lesson 4: Exposed ply edges require a lot of sealing. At least 2-3 coats of Sanding Sealer rubbed down between coats, especially around the driver rebate. Will also require body filler rubbed down to get any butt joints to be a true smooth and invisible finish. This is time consuming and labour intensive. We thought we had cracked this, especially around the driver rebates. However, when applying the black paint, this being a thinner more aggressive paint than the primer, it seeped under the top layer of ply in a couple places lifting the layers. So more rubbing back, filler and sanding back with fresh layer of paint! Lesson 5: It would be far easier and cheaper to produce a Piano Black paint finish using MDF with round-over edges, rather than Birch Ply. In the end I decided to veneer the speakers in my usual way first rubbing back all that nice paint finish so to give a key for the glue. I really hated having to do this but I just couldnt live with the speakers with how the finish looked after I had tried to get the drivers to fit into the rebates.  I chose Zebrano as I am presently building another pair of speakers in this veneer and had just enough of the veneer left over to cover these smaller speakers. So here are a couple photos of my prototype pair ready for anyone who wants to come over and listen to them. When I have some spare time I shall knock up a pair these speakers in MDF, knowing now what to do prior to painting and then get the guy to just sray them with me doing all the labour intensive prep work. Hopefully second time around well achieve that elusive piano black finish and too boot they will sound just as good as the veneered ply ones. 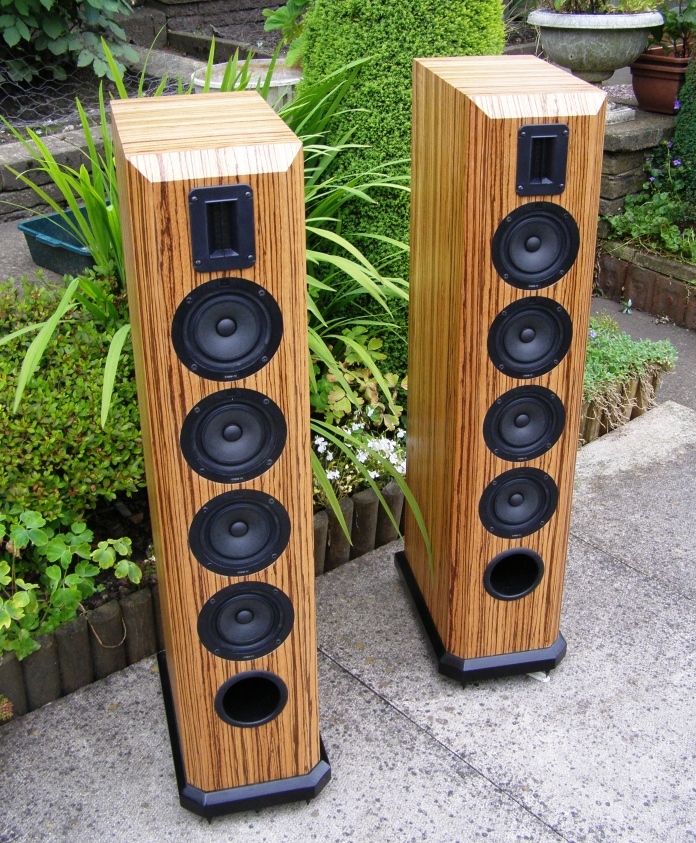 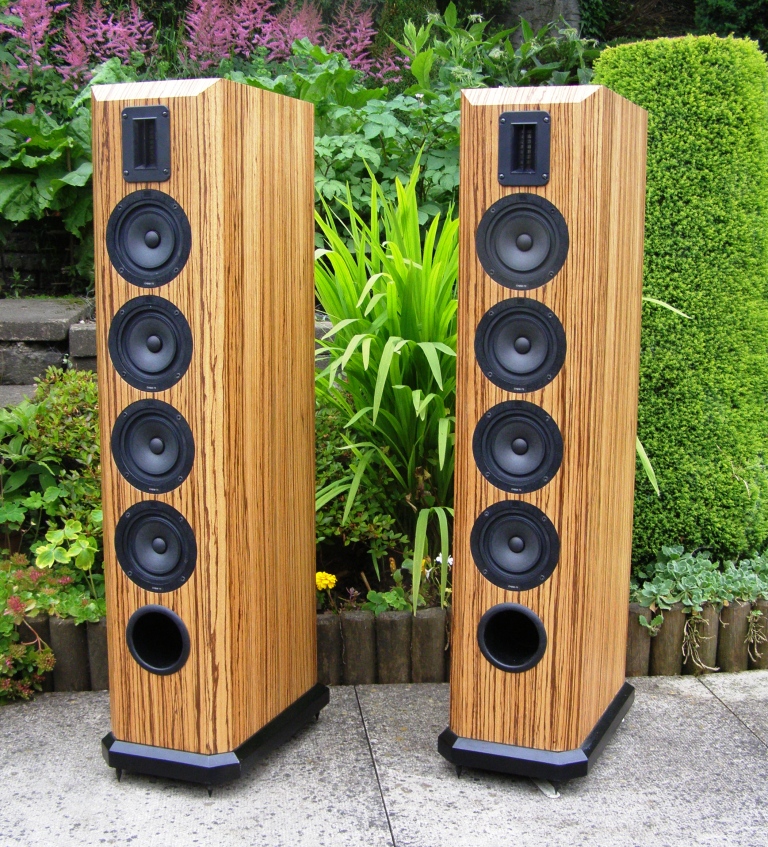
|


 Linear Mode

